
I took a three-day course with Owen Bush, more or less the premier swordsmith of the United Kingdom, a vast base of knowledge and experience, authority on his ancestors' Anglo-Saxon seax, talented and dedicated artisan, and dedicated giver to the craft and community. His famous annual hammer-in has provided an incredible forum for the informed bladesmithing community, as well as served as a crucible of ideas for the leading minds of the modern movement of swordsmithery.
The basic concept of pattern-welding is the mixing of steels in a semi-solid state by forge-welding them to each other. In preparation, different or similar steels must be aligned for lamination. With modern simple steel alloys in alternating layers, I prepared these packets for forge-welding:

Forge-welding itself is a nigh magical process, essentially wizardry, in such a way that even our modern understanding of metallurgy, chemistry, thermodynamics, and physics cannot dim. For those of you who are more curious about the specifics of pattern-welding, I will be explaining the individual steps further as I post works-in-progress. However, Don Fogg's bladesmithing forum is an invaluable resource, and there is good information to be found here at patternwelding.info.
But back to the thrilling tale of molecular abomination: I donned these shamanic masks for the protection of my soul:

Almost all of my experience in forge-welding has been in a gas forge under a power hammer. Many smiths would criticize me for such modern techniques; there is a sentiment that they distance one from the spirit of the craft. I feel no shame, although I would like to take the time to experiment more with solid fuel forges and of course with hand hammering. That is an argument I will save for a later discussion. For my purposes, these tools serve me well and allow me to make what I want in a way I think is appropriate.
The bearded sorcerer at his black art with his hulking eldritch machines:

Owen and his apprentice Owen running the show:

Those two packets I showed in preparation above got forge-welded into billets, one of which was turned into the two twisted bars on top, and one of which was folded on the laminated plane multiple times into ~320 layers on the bottom. The diagonals of the twist can be seen as an imprint in the black scale on the top two:

The reason it's visible is that the two different steels involved, 1080 and 15n20, have different oxidation rates and reactions, causing that layer of black rust ("scale"; oxidation caused by heat) to form differently over the different layers. Rust itself, oxidation, is an inhibitor in the welding process (steel welds to steel, scale does not weld) and must be ground off of the surfaces to be bonded, looking like the shiny bar on the bottom. Here is another shot of the twisted bar:

Those three bars above, two twisted, one folded repeatedly (often called "piled"), have been thereafter welded (from left to right) into the below blank. The edge bar being on the right, the left top corner has been clipped off to ease the forging of the shape and result in minimal pattern distortion.

Here you can see more of the pattern as I forged out the shape. The visual difference here is not caused by scale but rather a difference in heat contraction speeds between the two steels as the blade cools in the air.
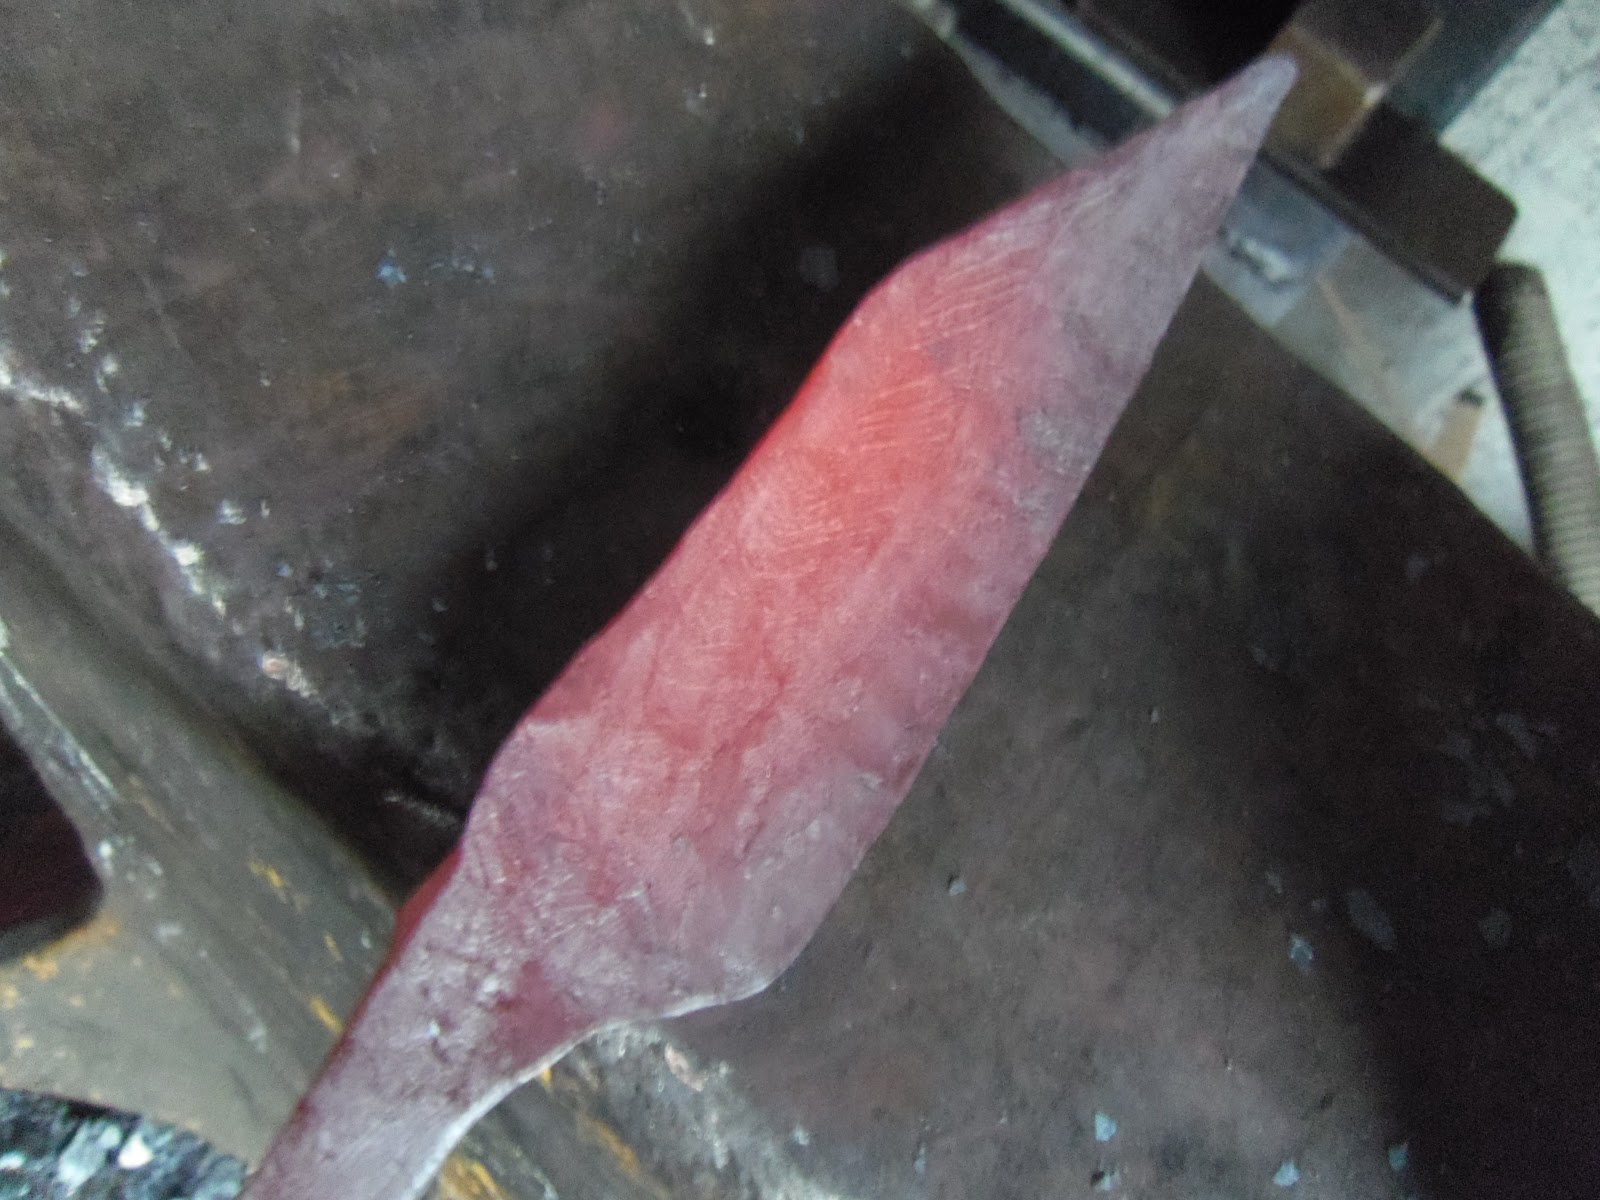
This is the blade after a few more tweaks of the hammer and cleaning up the tang shoulders with a bench grinder:

After normalization (heating the blade and letting it cool to reduce stress of heating and forging caused by crystalline grain growth), I ground the seax to shape. I used a 72" belt grinder and gave it a flat grind (triangular in cross-section. After that comes what is called the "heat treatment": I hardened the blade (brought to critical temperature and quenched to make a rigid but brittle microstructure) and then tempered it (brought it to a lower critical temperature and allowed it to cool slowly, to reduce brittleness while maintaining most hardness).
Heat-treatment is an imperative step for all blades, not just pattern-welded ones. However, that first step of normalization (to reduce blade stress and thus risk of cracking in the quench) may be even more important in pattern-welded blades owing to their theoretically equal but possibly less stable construction of multiple materials. A smith must keep in mind the thermodynamic properties and behaviors of his different materials during heat-treatment and change them accordingly.
After all that comes a finer grind with belts increasing in grit weight, and finally culminating in wet hand-sanding in a final, decisive direction.

Welding is a really tough job, especially shaping and forming the metal while pounding it. You really must be passionate about this! Plus, I learned that you should be extra careful because it may crack and you have to start all over again.
ReplyDeleteI prefer to weld thicker pieces as they hold the heat longer so they are easier to forge. But yes, it's tough job; it takes careful concentration and high level of alertness for you are working with scorching metals and elements. If you are sleepy and not focused, better pass the job to someone who can do it.
ReplyDeleteJeanette West
I read that Post and got it fine and enlightening. welding jupiter
ReplyDeleteNot to worry, the feedbacks and suggestions all play a positive role in making Lotos all the more favorable among the users. plasma cutters
ReplyDeleteAmazing content to read and gonna find some fruitful information every time. After welding the piece, let it to normalize temperature
ReplyDeletebest welding under 500